Tuesday, 26 September 2017

Castella Cake (Coconut Cream) 椰香古早味蛋糕


There's a recent craze about Taiwanese Castella Cakes (or Kasutera Cakes) in Singapore. My sister-in-law queued almost an hour for the Original Castella Cake few days ago. I told my husband that I could bake for him instead. Upon his request, I'd instilled a very subtle tinge of local touch and made it a little more flavourful by using coconut oil and coconut cream to replace the normal vegetable oil and milk. This Castella Cake (Coconut Cream) 椰香古早味蛋糕 yielded me wonderful texture, fragrance and flavour I must say! Do you believe that I didn't see any loose crumb falling off the cake from the time I removed it from the oven, cooled, sliced, took photos and stored?

You'll be disappointed if you're expecting a pungent coconut flavoured cake. In this version, the coconut fragrance and taste were very subtle as I did not use any essence or flavourings besides coconut cream and coconut oil. My intention was still to keep it as close to the Original Castella Cake as possible. 


Ingredients (for a 7-inch square baking tin) :

Group A Ingredients
  • 70 ml coconut oil
  • 90 gm cake flour or top flour (sieved beforehand)
  • 65 ml coconut cream
  • 6 large egg yolks (I used 70 gm eggs)

Group B Ingredients
  • 6 large egg whites (I used 70 gm eggs)
  • 80 to 85 gm sugar (subject to your preferred sweetness level)
  • 1/5 tsp salt

(tsp = teaspoon; tbsp = tablespoon) 


Method :
  1. Lay baking paper in 7-inch square baking tin (refer to pic below). 
  2. Pre-heat oven to 140C (upper and lower heat, no fan). To prepare for steam bake, pour hot water into a tray and insert below baking rack (refer to pic below).
  3. Heat coconut oil in saucepan till fragrance emits. Set aside.
  4. In a separate saucepan, heat coconut cream at low heat. Turn off heat immediately upon bubbling. Set aside.
  5. In a large bowl, combine hot coconut oil with flour. Mix well till there's no more clumps. 
  6. Fold in coconut cream and egg yolks into same bowl and mix till a smooth batter is formed. Set aside.
  7. In a separate mixing bowl, add salt to egg whites.
  8. Start mixer and slowly fold in sugar till firm peak is formed (I used a KitchenAid Mixer - Speed 1 for 1 minute then Speed 8 for another 1 to 1.5 minute. Have to eyeball to decide).
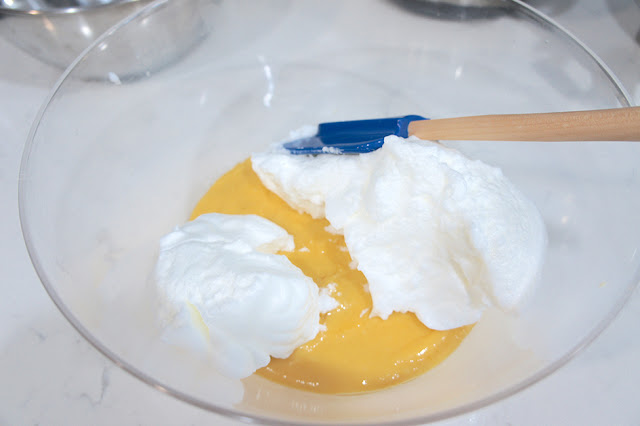
  9. Gently fold in meringue into Group A's egg yolk batter in 3 batches. Each time, use a spatula to fold gently and swiftly. 
  10. Final cake batter (i.e. Group A + Group B) all ready when no streaks remain.
  11. Transfer batter to lined baking tin.
  12. Tap baking tin against kitchen top a few times to rid air bubbles.
  13. Use a satay stick to quickly stir through the cake batter in the baking tin as a final attempt to remove air bubbles if necessary. 
  14. Steam bake in oven at 140C for 70 minutes. Then 150C for a further 5 to 10 minutes. Do not attempt to open oven door while making the adjustments as it would impact the temperature and the cake may shrink.
  15. Remove from oven once satisfied with the colour of cake at the end of baking time.
  16. Immediately tap baking tin on a kitchen top a few times to prevent shrinkage.
  17. Remove cake from baking tin and baking paper.
  18. Leave cake to cool before slicing.
  19. Store in airtight container(s) in refrigerator after sliced.

Do note that temperature and baking time may vary in accordance to different oven makes, sizes and  performances.  

(scroll to bottom of page, click on "Print" or "PDF" icon for printer friendly recipe)


Wednesday, 20 September 2017

Fusion Herbal Duck Gnocchi


*in collaboration with Casa Rinaldi for gnocchi

We deliberately kept 2 duck legs and a box of poaching mixture from yesterday's Cantonese Roast Duck 广式烧鸭 so that we could put to good use by creating a Fusion Herbal Duck Gnocchi. 

Gnocchi is a type of traditional Italian pasta. They look like small dumplings and primarily made up of potatoes and flour. Casa Rinaldi has made it so easy and convenient now by introducing the packet ones to Singapore. All we have to do is to boil it for short few minutes and the gnocchi could be served with any sauce and cooked ingredients.

To create this fusion dish, I'm marrying herbs from the East and West so that an all new complex layering of flavours could be presented and serve. Adventurous but I can only say that it worked for us. Try it if you would like to explore something different!

Casa Rinaldi Gnocchi is available exclusively at NTUC finest under the pasta section. (Retail price at $9.50 per pack). Don't miss out Casa Rinaldi giveaway at http://bit.ly/2f9PfwJ


Ingredients (enough for 2 pax) :
  • 250 gm Casa Rinaldi Gnocchi (available at NTUC Finest)
  • 2 roasted duck legs (click here for recipe to Cantonese Roast Duck 广式烧鸭)(can use stall bought duck legs if you do not intend to roast duck yourself)
  • 10 pcs cherry tomatoes
  • 4 to 5 pcs Dang Gui (Chinese Angelica Root) 当归
  • 2 sprigs rosemary
  • 2 sprigs thyme (optional)
  • a handful of oregano (optional)
  • 500 ml poaching mixture from roasting duck (refer to previous post on Cantonese Roast Duck 广式烧鸭)(otherwise, make mixture by mixing 2 tbsp hoisin sauce, 2 tbsp light soy sauce, 1 tsp dark soy sauce, 1 tbsp dark vinegar, 1 tbsp sugar, 2 tbsp cooking wine, 1/2 tsp black pepper, 450 ml water and bring to boil)
  • 2 tsp corn starch (stir and mix well with 2 tbsp water)
  • 2 tsp Wolfberries 枸杞子
  • 4 slices ginger
  • 4 cloves garlic (thinly sliced)
  • 1 large onion (finely chopped)
  • 2 pcs streak bacons (cut to bits)
  • grounded black pepper (to taste)(to be added before serve)
  • chopped English parsley (for garnishing)
  • 2 tbsp cooking oil 

(tsp = teaspoon; tbsp = tablespoon) 

Method :
  1. Turn on oven to heat roasted duck legs and cherry tomatoes. Set aside.
  2. In a saucepan, add roast duck poaching mixture, dang gui, wolfberries, rosemary and all herbs. Bring to boil at medium heat.
  3. Once boiled, turn to low heat, cover lid and allow to simmer for another 15 to 20 minutes.
  4. Remove and discard herbs from saucepan.
  5. Fold in starch mixture slowly and stir well till the sauce thickens to your desired texture. Set aside.
  6. In a separate pot of boiling water, boil gnocchi for 1 to 2 minutes or till they start floating. Drain and set aside.
  7. In a frying pan, heat cooking oil at medium heat.
  8. Fold in bacon bits and stir fry till aromatic.
  9. Toss in ginger, onions, garlic and still fry till aromatic.
  10. Fold in boiled gnocchi and pan fry till slightly browned and chewy. 
  11. Turn off heat and dish out.
  12. Top with thickened sauce, tomatoes, roasted duck legs, a dash of grounded black pepper and garnishing before serve.
  13. Serve whilst hot.

(scroll to bottom of page, click on "Print" or "PDF" icon for printer friendly recipe)


Cantonese Roast Duck 广式烧鸭


My family members are true blue Cantonese that enjoy any kind of Cantonese roasts, be it roast pork, char siew, roast chicken or duck. The Cantonese Roast Duck 广式烧鸭 probably tops my family's list. I usually have to queue early at the popular stalls over weekends to buy our favourite roast duck. Sometimes, I disappoint them by coming home empty handed when the roast ducks are sold out in the morning! Seeing how much they love this Cantonese Roast Duck 广式烧鸭 spurred me on to do it myself at home. 

i have done this Cantonese Roast Duck 广式烧鸭 quite a few times as of now. In view of my poor stitching skills, I had tweaked it from the traditional way of sealing the poaching liquid in the duck cavity. Instead, I inserted  pineapple chunks into the cavity to keep the meat tender and moist. I have also simplified the processes a little to suit my home kitchen environment. Albeit all these changes, I do not think I have compromised much in taste and texture. Not as traditional in the prepping and not as difficult as most people perceived, but this homemade version of Cantonese Roast Duck 广式烧鸭 is a hit at home. 


Ingredients (enough for 4 pax) :
  • 1 duck (about 2 to 2.5 kg)(cleaned and pat dry) 
  • 1 tbsp Chinese five spice powder (to dry rub the duck)
  • 2 tsp salt (to dry rub the duck)
  • 1 tsp grounded pepper (to dry rub the duck)(I used grounded Szechuan peppercorn)
  • 1 slice pineapple (cut to chunks)

Poaching Mixture (A) :
  • 1 cinnamon stick
  • 2 star anise (broken into smaller pieces)
  • 3 cloves
  • 6 cloves garlic (finely chopped)
  • 6 slices ginger
  • 3 stalks spring onion (tie in a knot)
  • 1 tbsp five spice powder
  • 2 tbsp hoisin sauce
  • 4 tbsp light soy sauce
  • 2 tbsp dark soy sauce
  • 4 tbsp dark vinegar
  • 4 tbsp Shaoxing cooking wine
  • 1/2 cup dark sugar syrup (those used for baking mooncakes)(can replace with honey)
  • 2 pcs rock sugar (approx. 2 tbsp portion)
  • 2.5 litre water
  • 2 tbsp cooking oil

Brushing Mixture (B) : 

  • 1 tbsp Hoisin Sauce
  • 1 tbsp dark sugar syrup or honey
  • 50 ml water

(tsp = teaspoon; tbsp = tablespoon) 

Method :
  1. Score duck skin with a needle tenderiser. Do not have to puncture/pierce into the meat. Try not to tear the skin. 
  2. Mix dry rub ingredients together in a bowl evenly (i.e. 1 tbsp five spice powder, 2 tsp salt, 1 tsp grounded pepper).
  3. Marinade the duck by dry rubbing mixture on the surface of duck and inside the cavity. Adjust the quantity of salt/powder in accordance to the size of the duck.
  4. Chill the duck in the refrigerator for at least half a day (do not cover with lid).
  5. When time's due, remove duck from chiller to rest at room temperature. 
  6. Heat big pot with cooking oil at medium heat. 
  7. Toss in aromatic ingredients (in Group A) (i.e. ginger, garlic, spring onion, cinnamon, cloves, star anise)  and stir fry till fragrant. 
  8. Fold in mixture comprising all other poaching ingredients (in Group A) into pot and allow to simmer till boiled.
  9. Hold the duck vertically above the pot. Use a ladle to poach duck with boiling poaching mixture.
  10. Repeat at least 3 times till the skin tightens. 
  11. Do not waste the poaching liquid. Strain and freeze poaching liquid in storage boxes to braise or cook other dishes.
  12. Pat dry duck with paper towel.
  13. Insert pineapple chunks to fill up the cavity of duck.
  14. Hang the duck to air dry for at least half a day. 
  15. Pre-heat oven to 190C, grill mode (fan assist) before roast.
  16. Mix all ingredients in Brushing Mixture (Group B) in a bowl evenly.
  17. Arrange duck on roasting pan.  
  18. Lightly brush entire surface of the duck with Brushing Mixture. The skin will easily get burnt if brushed too thick.
  19. Send duck to roast in lower tier of oven for 25 to 30 minutes (subject to size of duck)
  20. Turn duck over and roast for another another 25 to 30 minutes (subject to size of duck). (Note : If you use a roasting rack over the pan like me, you probably do not have to turn the duck as the duck will still be evenly roasted at the bottom as there's no contact at the bottom. Just continue roasting will do.)
  21. Turn duck back to breast side up.
  22. Adjust oven temperature to 230C and allow to roast for another 10 minutes (adjust timing according to size of duck) to achieve crispy skin.
  23. Remove duck from oven when even skin colour is achieved.
  24. Allow to rest at room temperature for at least 30 minutes before cutting the duck to serve.
  25. Remove and discard pineapple chunks from cavity before serve.

Note : Roasting time and results may vary due to size of duck and different oven makes. Do adjust accordingly. As heat distribution for every oven varies, you may find certain parts of the duck more burnt. If you find any part of the skin starting to burn (usually at the top and the tip of the wings), cut a piece of foil and cover over that portion will do.


(scroll to bottom of page, click on "Print" or "PDF" icon for printer friendly recipe)