There's a recent craze about Taiwanese Castella Cakes (or Kasutera Cakes) in Singapore. My sister-in-law queued almost an hour for the Original Castella Cake few days ago. I told my husband that I could bake for him instead. Upon his request, I'd instilled a very subtle tinge of local touch and made it a little more flavourful by using coconut oil and coconut cream to replace the normal vegetable oil and milk. This Castella Cake (Coconut Cream) 椰香古早味蛋糕 yielded me wonderful texture, fragrance and flavour I must say! Do you believe that I didn't see any loose crumb falling off the cake from the time I removed it from the oven, cooled, sliced, took photos and stored?
You'll be disappointed if you're expecting a pungent coconut flavoured cake. In this version, the coconut fragrance and taste were very subtle as I did not use any essence or flavourings besides coconut cream and coconut oil. My intention was still to keep it as close to the Original Castella Cake as possible.
Ingredients (for a 7-inch square baking tin) :
Group A Ingredients
- 70 ml coconut oil
- 90 gm cake flour or top flour (sieved beforehand)
- 65 ml coconut cream
- 6 large egg yolks (I used 70 gm eggs)
Group B Ingredients
- 6 large egg whites (I used 70 gm eggs)
- 80 to 85 gm sugar (subject to your preferred sweetness level)
- 1/5 tsp salt
(tsp = teaspoon; tbsp = tablespoon)
Method :
- Lay baking paper in 7-inch square baking tin (refer to pic below).
- Pre-heat oven to 140C (upper and lower heat, no fan). To prepare for steam bake, pour hot water into a tray and insert below baking rack (refer to pic below).
- Heat coconut oil in saucepan till fragrance emits. Set aside.
- In a separate saucepan, heat coconut cream at low heat. Turn off heat immediately upon bubbling. Set aside.
- In a large bowl, combine hot coconut oil with flour. Mix well till there's no more clumps.
- Fold in coconut cream and egg yolks into same bowl and mix till a smooth batter is formed. Set aside.
- In a separate mixing bowl, add salt to egg whites.
- Start mixer and slowly fold in sugar till firm peak is formed (I used a KitchenAid Mixer - Speed 1 for 1 minute then Speed 8 for another 1 to 1.5 minute. Have to eyeball to decide).
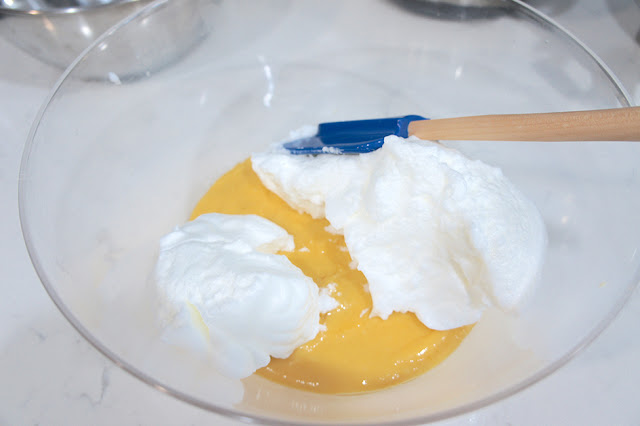
- Gently fold in meringue into Group A's egg yolk batter in 3 batches. Each time, use a spatula to fold gently and swiftly.
- Final cake batter (i.e. Group A + Group B) all ready when no streaks remain.
- Transfer batter to lined baking tin.
- Tap baking tin against kitchen top a few times to rid air bubbles.
- Use a satay stick to quickly stir through the cake batter in the baking tin as a final attempt to remove air bubbles if necessary.
- Steam bake in oven at 140C for 70 minutes. Then 150C for a further 5 to 10 minutes. Do not attempt to open oven door while making the adjustments as it would impact the temperature and the cake may shrink.
- Remove from oven once satisfied with the colour of cake at the end of baking time.
- Immediately tap baking tin on a kitchen top a few times to prevent shrinkage.
- Remove cake from baking tin and baking paper.
- Leave cake to cool before slicing.
- Store in airtight container(s) in refrigerator after sliced.
Do note that temperature and baking time may vary in accordance to different oven makes, sizes and performances.
(scroll to bottom of page, click on "Print" or "PDF" icon for printer friendly recipe)


0 comments:
Post a Comment