Showing posts with label Breads. Show all posts
Monday, 23 October 2017

Bacon Buns 火腿面包


I wanted to get rid of the back bacon sitting in my fridge. These Bacon Buns 火腿面包 have to be one of the easiest buns that I'd made. Didn't refine the shaping and didn't want to crack an egg just for the egg wash....so they're quite raw looking....but trust me....they're yummy! Personally, I prefer to steam my buns for about 5 minutes before consumption as I like them really soft, fluffy and hot! How about you?

Recipe

Ingredients for Tangzhong/Starter :
  • 2 tbsp bread flour
  • 3 tbsp full cream milk
  • 3 tbsp water

Ingredients for Bread Dough (Yield 10 to 12 Buns) :
  • 2.5 cups bread flour
  • 2 tbsp baking milk powder
  • 1/2 cup full cream milk
  • 1/4 cup coconut oil
  • 1 large egg (beaten)
  • 1/4 tsp salt
  • 3 to 4 tbsp sugar (or to taste)
  • 1 tbsp instant yeast

Ingredients for Bread Fillings :
  • 10 to 12 pcs streak bacon 

(tsp = teaspoon; tbsp = tablespoon) 


Method :
  1. Prepare tangzhong first by mixing all ingredients in a small saucepan. Whisk until texture is smooth. Then cook the mixture at very low heat for 3 to 5 minutes. Whisk continuously. Tangzhong is ready when mixture thickens and leaves lines at bottom of saucepan as you whisk. Transfer to bowl and set aside to cool down.
  2. Prepare dough by mixing room temperature tangzhong with all bread dough ingredients in a bread maker, mixer or knead by hand. Knead until dough is smooth and elastic.
  3. Proof entire dough for 1.5 hour in oven. To proof, set oven to 50C, put dough in a tin and send to oven. Place a small bowl of room temperature water in the oven as well.
  4. Meanwhile, roll 10 to 12 pcs streak bacon (1 pc per roll). Set aside.
  5. Remove dough from oven when time's up. The dough should be puffed up by then. Shape dough to 10 or 12 equal size balls.
  6. Lightly flatten each ball in palm and insert 1 bacon roll into dough. Roll into ball shape again in between palms.
  7. Line 10 to 12 dough balls (with bacon fillings) in a lined baking pan or tray.
  8. Send buns to proof in oven again at 50C for further 45 minutes.
  9. Remove bun tray/pan and bowl of water from oven when time's up. The bun doughs should have risen nicely. 
  10. Adjust oven to 180C. 
  11. Bake buns for 20 to 25 minutes (or till buns turn golden brown colour). 
  12. Remove buns from oven and allow to cool in bun pan/tray for 15 minutes before serve. The buns would be even more soft and fluffy if you steam them another 5 minutes just before consumption.

(scroll to bottom of page, click on "Print" or "PDF" icon for printer friendly recipe)


Saturday, 3 June 2017

Marmite Cheddar Cheese Buns 妈蜜芝士面包


*Recipe in collaboration with Marmite.

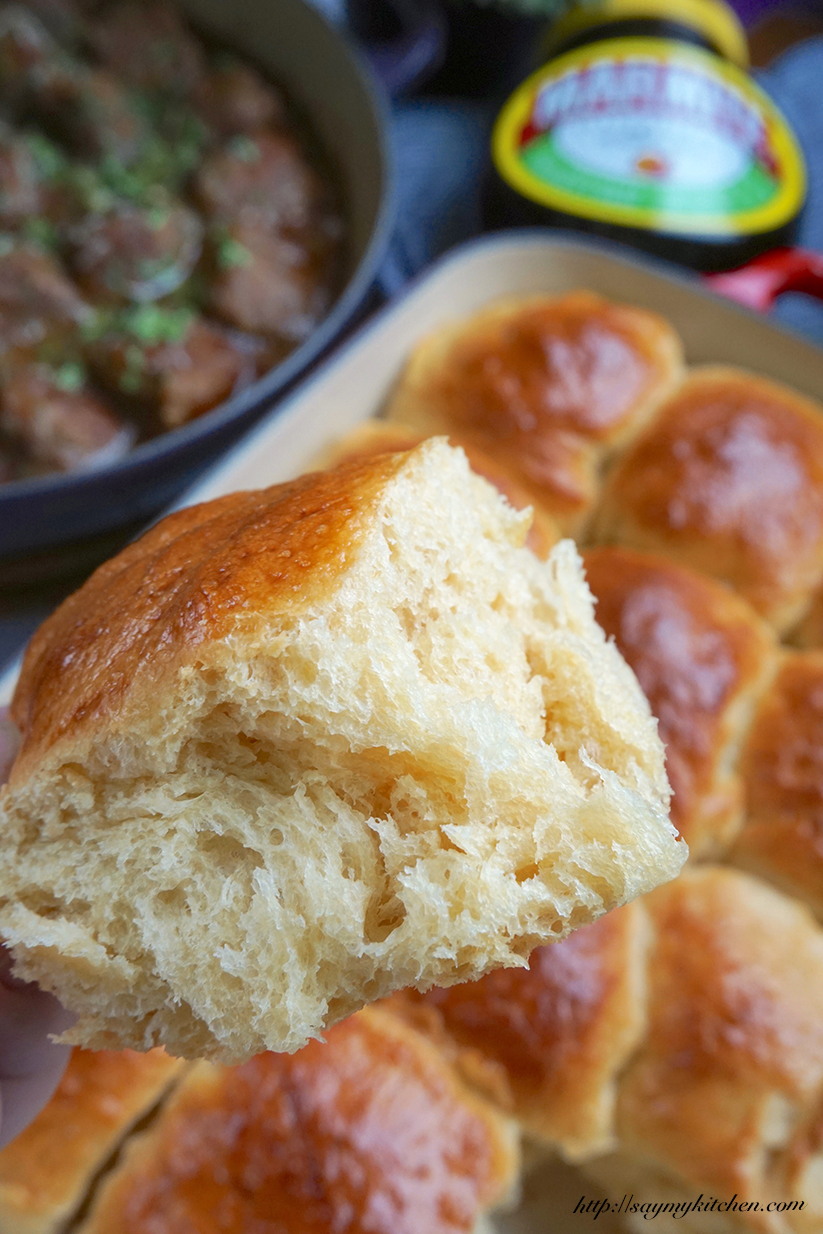
I have been reading about the many benefits of Marmite lately. The high concentration of Vitamin B12 in the yeast extract seems to carry loads of goodness for our bodies. Benefits such as boosting of brain power, staving off dementia, keeping the hearts healthy are few of the many mentioned. Since bread is a staple food for my family's daily diet, I thought I would add the goodness of Marmite into my homemade breads. I created this soft and fluffy Marmite Cheddar Cheese Buns 妈蜜芝士面包 using an easy tang zhong (starter) method. The buns were also made to complement the Marmite Meatballs 妈蜜肉丸, a flavourful dish. Trust me, the sauce from the meatballs serves as an ideal dipping sauce for these buns. They just go so well together!


Ingredients for Tangzhong/Starter :
  • 2 tbsp bread flour
  • 3 tbsp full cream milk
  • 3 tbsp water

Ingredients for Bread Dough (Yield 12 Buns) :
  • 2.5 cups bread flour
  • 2 tbsp baking milk powder
  • 1/2 cup full cream milk
  • 1/4 cup softened butter
  • 1 large egg
  • 1 tsp Marmite
  • 3 to 4 tbsp sugar (or to taste)
  • 1 tbsp instant yeast

Ingredients for Bread Fillings & Egg Wash :
  • 100 gm Cheddar cheese block
  • 1 small egg (beaten)

(tsp = teaspoon; tbsp = tablespoon) 


Method :
  1. Prepare tangzhong first by mixing all ingredients in a small saucepan. Whisk until texture is smooth. Then cook the mixture at very low heat for 3 to 5 minutes. Whisk continuously. Tangzhong is ready when mixture thickens and leaves lines at bottom of saucepan as you whisk. Transfer to bowl and set aside to cool down.
  2. Prepare dough by mixing room temperature tangzhong with all bread dough ingredients in a bread maker, mixer or knead by hand. Knead until dough is smooth and elastic.
  3. Proof entire dough for 1.5 hour in oven. To proof, set oven to 50C, put dough in a tin and send to oven. Place a small bowl of room temperature water in the oven as well.
  4. Meanwhile, cut cheddar cheese block into 12 equal size cubes and set aside.
  5. Remove dough from oven when time's up. The dough should be puffed up by then. Shape dough to 12 equal size balls.
  6. Lightly flatten each ball in palm and insert 1 cheese cube into dough. Roll into ball shape again in between palms.
  7. Line 12 dough balls (with cheese cube filling) in a lightly greased bun pan.
  8. Send buns to proof in oven again at 50C for further 45 minutes.
  9. Remove bun pan and bowl of water from oven when time's up. The bun doughs should have risen nicely. 
  10. Adjust oven to 180C.
  11. Brush egg wash on buns. 
  12. Bake buns for 25 to 30 minutes (or till buns turn golden brown colour). 
  13. Remove buns from oven and allow to cool in bun pan for 15 minutes before serve. The buns would be soft and fluffy.

(scroll to bottom of page, click on "Print" or "PDF" icon for printer friendly recipe)


Tuesday, 22 March 2016

30-Minute Homemade Pandan Kaya 自制香兰咖椰酱


I attempted this Homemade Pandan Kaya (Coconut Egg Jam) 自制香兰咖椰酱 twice in a day. I tried using the bread maker the first time. Alas! I could not regret more! 

Do learn from my genuine mistakes :

  • I should not add gula melaka into my bread pan before they dissolve completely. The screeching sounds - when the palm sugar bits hit the walls of the bread pan were traumatising! I thought the non-sticking bread pan would damage totally after just a few seconds. I definitely made a wise decision to switch off the machine immediately.
  • Unlike my previous jam making experiences, this Pandan Kaya mixture was splattering wildly within the bread pan. I had a hard time cleaning the bread maker (inside out) thereafter. It was still attracting ants hours after the machine had been cleaned.

I must say that there are many successful bread maker's Pandan Kaya recipes that one can find online. It was my fault that I did not do sufficient research. I jumped the queue and relied wrongly on my instincts.

Nevertheless, my second attempt was a successful one! I used a simple saucepan to do the job instead. In my personal attempt to make the Pandan Kaya more authentic, I replaced white sugar with gula melaka (palm sugar) in hope to achieve a more fragrant and traditional aroma. This Homemade Pandan Kaya (Coconut Egg Jam) 自制香兰咖椰酱 is easy to make and would take only 30 minutes! More importantly, it received thumbs up from everyone at home! 


Ingredients (enough for a 255 gm or 9 oz bottle) :
 Download Printer Friendly Recipe
Download Printer Friendly Recipe


  • 150 gm fresh coconut milk
  • 2 large egg yolks
  • 125 gm gula melaka/palm sugar (adjust in accordance your taste)
  • 1.5 tbsp pandan juice (learn how to DIY Concentrated Pandan Juice here)
  • 1/2 tsp pandan essence (optional)
  • 2 tsp corn/potato starch flour
  • 2 tbsp water


(tsp = teaspoon; tbsp = tablespoon)    


Tip 1 : Omit egg yolk so that the cooking timing can be shortened by increasing heat. This would avoid lumpy jam caused by the egg whites.


Tip 2 : Use gula melaka (aka palm sugar) instead of white sugar for the traditional flavour.


Method : 

  • Pound gula melaka/palm sugar to bits.

  • Beat egg yolk and sieve to ensure egg mixture is smooth.
  • Add gula melaka/palm sugar, egg mixture, coconut milk, pandan juice and pandan essence to saucepan and cook at low-to-medium heat. Evenly stir the mixture in the saucepan while cooking so that gula melaka/palm sugar would be completely dissolved. Continue to stir to prevent lumpy mixture.

  • Add starch mixture (by combining 2 tsp corn/potato starch with 2 tbsp water and stir till all flour dissolved in water) to saucepan after 15 minutes.

  • After few minutes of continuous stirring in the saucepan, the pandan kaya would be cooked down. It would look thick and rough.

  • To achieve a smooth and silky texture, use an electric blender to blend the pandan kaya mixture with just a few quick pushes (do not over blend).

  • Once blended, the pandan kaya should achieve a smooth and silky texture. Use a spoon to scoop pandan kaya from the blender. The mixture should not drip (meaning the thickness and texture is correct) if it is blended just nicely.

  • Transfer pandan kaya to a sterilized bottle. It is important to have it completely cooled down before capping to avoid condensation in the bottle. Condensation would result in mouldy kaya. Never consume mouldy kaya. 


Store the freshly made Pandan Kaya 香兰咖椰酱 in refrigerator subsequently. The Pandan Kaya 香兰咖椰酱 has a short life span due to the usage of fresh coconut milk and eggs. That explains why my recipe is meant for a smaller serving. We would not be in time to consume anything more in a short time frame. Try to consume within few days of preparation.

My favorite butter and kaya toast......here I come.....


P.S. - If you prefer to make a larger portion, you would not go too wrong with a 1:1:1 rule. That means almost equal portion of coconut milk (e.g. 200 gm) vs egg yolks (e.g. 200 gm) vs gula melaka (e.g. 200 gm) although I personally prefer to cut down on gula melaka. 


Friday, 18 March 2016

Bread Maker Fun : Pandan Loaf 自制香兰面包


I did not want to waste the leftover homemade pandan juice that I made for Pandan Chiffon Cake 香兰威风蛋糕. I was contemplating to make pandan flavour tarts, bread or kaya. However, I soon realised that I was left with only 60 gm coconut milk in my refrigerator. I knew most pandan flavour tarts and kaya recipes could not compromise for so little coconut milk. My only option was to experiment with pandan bread recipes. My family lives on bread loaves for breakfast.  Pandan Loaf 香兰面包 that's it!

I usually bake our home loaves using my bread maker. Experimenting my own concortion for bread maker recipes was not something new. I was quite confident with my Pandan Loaf 香兰面包 recipe.


 Download Printer Friendly Recipe
Download Printer Friendly Recipe
Ingredients (enough for a 750 gm bread loaf) :
  • 100 ml water
  • 2 tbsp coconut or peanut oil
  • 1/2 tsp salt
  • 2 tsp brown sugar (You would have realised that I really cut down on salt and sugar in my recipe. Add more to your taste if you prefer.)
  • 300 gm bread flour
  • 60 gm fresh coconut milk
  • 2 tbsp condensed milk
  • 1 tbsp pandan juice (learn how to DIY Concentrated Pandan Juice here)
  • 1 tsp pandan paste (available from supermarkets)
  • 1/2 tsp pandan essence (optional)(I added this as I prefer more fragrance from my bread)
  • 1 tsp instant yeast


(tsp = teaspoon; tbsp = tablespoon)    


Tip 1 : Store yeast in freezer for longer life and effectiveness.


Tip 2 : When adding ingredients, do not let yeast get in direct contact with salt and water. Salt is a yeast inhibitor. It would retard or stop yeast activity.


Method : 

  • Heat fresh coconut milk to boiling point (or till it starts bubbling). Set aside.
  • Add condensed milk, oil, pandan juice, pandan paste, pandan essence and water into coconut milk.
  • Stir till mixture is well blended.
  • Fold in mixture into bread pan.
  • Add brown sugar and salt.
  • Fold in bread flour.
  • Last to add instant yeast. Do not let yeast get in direct contact with salt and water. Salt is a yeast inhibitor and would retard or stop yeast activity.
  • Mount bread pan back to bread maker and close lid.
  • Set breadmaker to 'Sweet Bread' baking mode. Select the right weightage (750 gm) and preferred colour tone (light, mid or dark) and press 'Start'. In this instance, it takes 3 hr 25 mins to deliver. 
  • The knead blade would start working. After about 5 minutes, you should see a nicely kneaded dough. In the first few minutes, if you see the dough being too watery, add a little bread flour. If you see the dough being too dry, add a little water (tsp by tsp) slowly until satisfied. Leave the dough alone after that. Try not to flip open the lid as it would disrupt the fermentation. Leave it alone till bread is baked.
  • Remove loaf from bread pan when time is due. If you prefer darker browning of the crust, send it to oven to bake a short 5 to 10 minutes at 160 degrees celsius (320 degrees fahrenheit). Let it cool down before cutting to slices. 
  • Use a bread knife to cut the loaf. A normal knife could not yield nice thin slices.
  • Nice and fragrant bread with almost perfect crust. The slices would go best with pandan kaya (coconut egg jam).


Unlike Pandan Chiffon Cake 香兰威风蛋糕, do not expect Pandan Loaf 香兰面包 to be melt-in-the-mouth kind of soft and fluffy. It is more crusty on the outside. As for the inside, it is still very soft, though with a little more texture. Nevertheless, it is a fantastic loaf and I could smell freshly baked aroma from afar!