Monday 31 August 2015

My Home Gardening - Vegetables 自耕自煮 (蔬菜篇)


I grow my vegetables on our roof terrace - a small area with abundant sunlight. This is where I grow all the edibles. And they are all organic....


1. Arugula Rockets

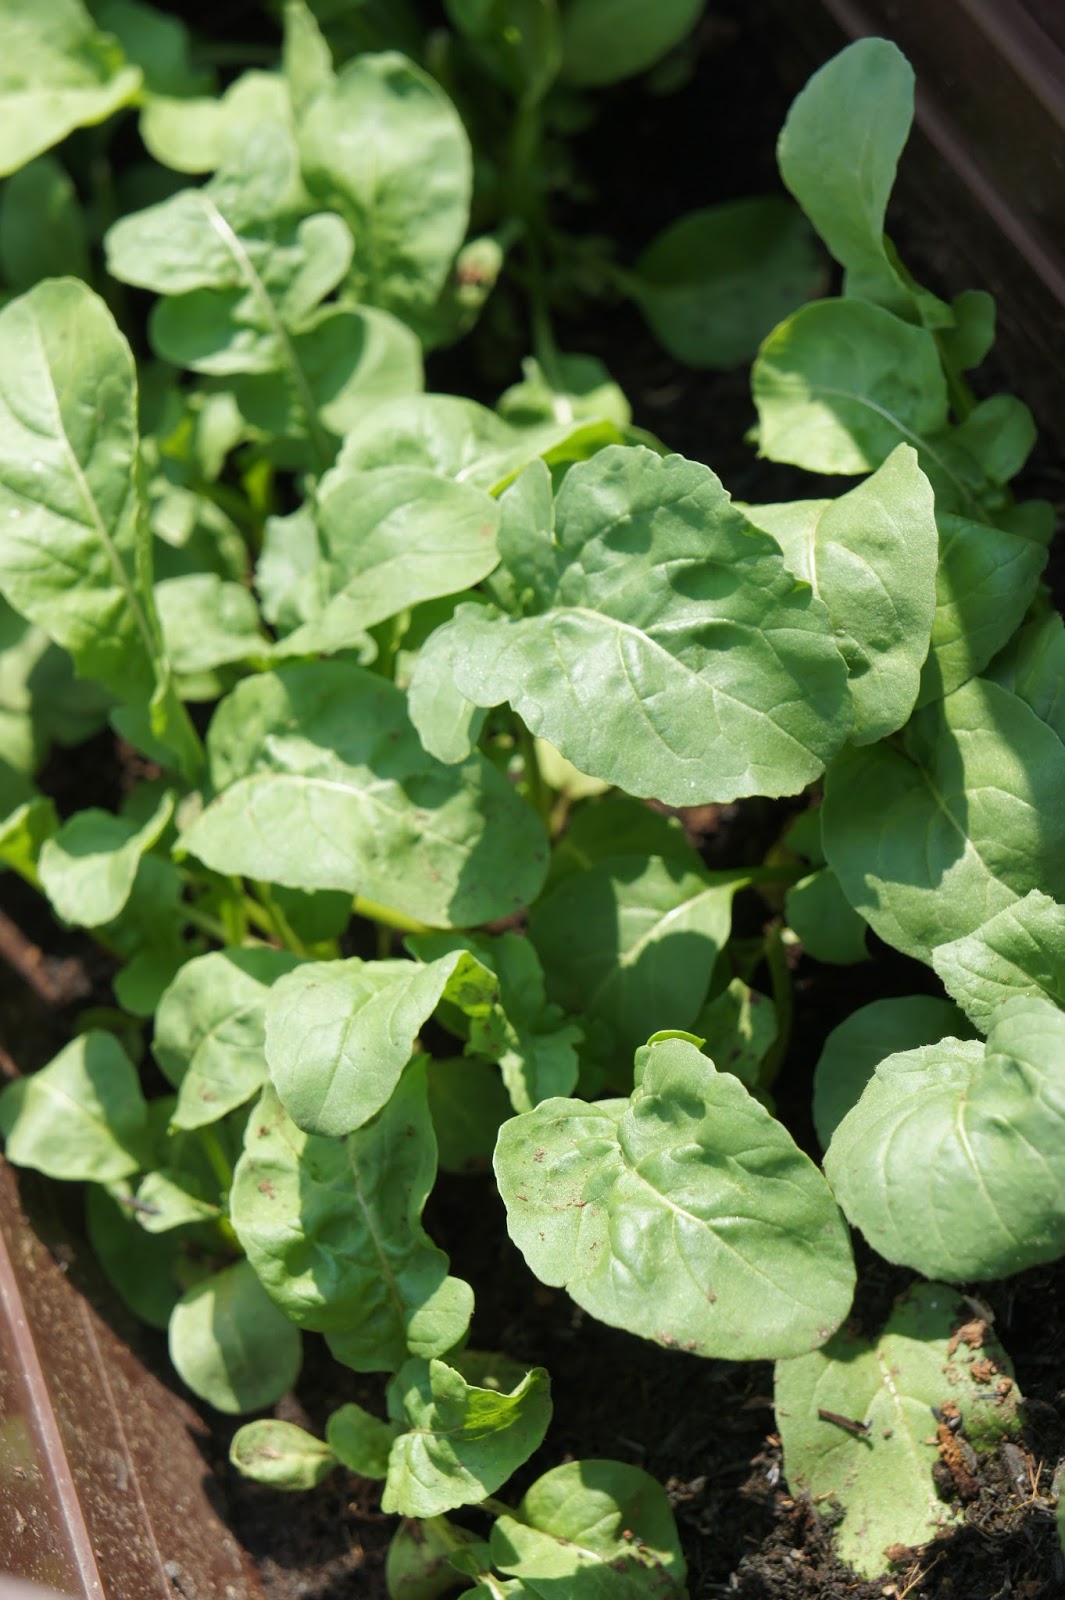
Arugula Rockets - I used French Arugula seeds. They were rather expensive (I paid SGD 9.90 for a small packet) but well worth the value. It took 5 weeks from seedling to  its first harvest. Almost 100% of the seeds sprouted but 15% succumbed to the continuous rainy days few weeks ago. They were too young and weak to withstand the continuous downpour. The surviving ones are ever blooming now. The more I trim and harvest, the better they seem to grow. I am seeing many more rounds of harvests before I exhaust them. 


It is essential to fertilize with organic fertilizers every 7 to 10 days from beginning. 

I used them as toppings for my Grilled Salmon Pizza. The peppery taste was excellent. I could taste its freshness in between my teeth....


2. Wild Rockets

Wild Rockets seem more beaten by Singapore's hot and humid climate in comparison to Arugula Rockets. It took much longer from seedling to harvest. I almost thought I lost the whole batch. The success rate from seedling to sprouting was about 50%. As I prefer Wild Rockets for salads & greens, I am still insistent to keep this on my list. 
Tough as they may be, my Wild Rocket leaves are still beautifully shaped. That is satisfying.

3. Eggplant

I cannot be happier with this eggplant. It has been flowering and fruiting continuously. I do give it a "flowering & fruiting" spa mist (spray fertilizer) on a weekly basis though.

This is a plant that need support assistance. I cable tie each main stem with a standing pole to let it thrive. Otherwise, they may not bear much fruits.

Eggplant needs excessive watering and very efficient drainage from the pot. I water it twice a day in hot weathers. These drooping leaves were in process of 'reviving' after my second round of watering today.


I am in the process of planting and seedling other local vegetables. I will share their photos when the crops are ready for some shots.


Saturday 29 August 2015

Chicken Lettuce Wraps 鸡丁生菜卷


The Chicken Lettuce Wraps - A single dish good enough to go with a bowl of plain rice. It is a dish that screams mom's home cooked food (家常菜)!

It is very easy to prepare and cook. And very budget friendly. 


Ingredients (enough for 2 to 4 pax if served together with rice) :

  • 1 big pc of boneless chicken thigh (washed, drained and chopped to dices)(I rubbed the chicken with a pinch of salt after drained and set it aside for 10 minutes before cook)
  • 1 cup frozen mixed vegetables 
  • 4 pcs dried mushrooms (soak to soften and diced)
  • 6 to 8 pcs iceberg lettuce (washed and drained)(to be used as wraps)
  • 4 cloves of garlic (finely chopped)
  • 4 slices of ginger (finely chopped or grated) 
  • 1 large onion (finely chopped)
  • 1 stalk of spring onion (finely chopped)
  • 1 stalk cilantro/coriander (optional)(finely chopped)
  • 1 pc red chilli  (optional)(sliced)
  • 2 tbsp shaoxing wine or rice wine 
  • 1.5 tbsp light soy sauce
  • few drops of dark soy sauce
  • a small pinch of salt
  • 1 tsp sugar
  • 1 tsp sesame oil
  • 2 tbsp cooking oil

(tsp = teaspoon; tbsp = tablespoon)    


Tip : I prefer finely chopped water chestnuts but substituted with frozen mixed vegetables as I ran out of water chestnuts. You do not have to strictly follow the recipe on the usage of ingredients. Just make use of what comes handy to you.


Method :

Heat cooking oil in skillet or wok. Then sauté aromatic ingredients in the following sequence : ginger, onions, garlic.
At medium to high heat, fold in the chicken dices and stir fry for 1 minute. 
Add diced mushrooms when chicken is about 70% cooked. After that, you may add 1.5 tbsp light soy sauce, few drops of dark soy sauce, a small pinch of salt, 1 tsp sugar, 2 tbsp rice wine. Stir all ingredients.
When chicken is almost cooked, add mixed vegetables (or finely chopped water chestnut if you have). Toss the ingredients again for another 1 minute.
When all ingredients are cooked, turn off the heat/fire and add red-cut chilli (optional), coriander (optional) and spring onions. Give it a final toss with 1 tsp sesame oil and transfer to serving bowl.
Ready to be served with iceberg lettuce.
This is really yummy! Exactly from a mom's kitchen.


Thursday 27 August 2015

Rosemary Roasted Potatoes


Potatoes dishes usually do not take the limelight as they are often served as side dishes. This is no different. I made this to share the oven space while baking a 12-inch pizza and also because I harvested too much rosemary this morning. 

It turned out to be very delicious....almost overshadowed the Grilled Salmon Pizza that came out from the same oven.


Ingredients (enough for 2 pax) :
  • 3 potatoes (do not peel)(washed and drained)(cut into quarters)
  • 1 to 2 stalks of rosemary (finely chopped)
  • 1 tbsp olive oil
  • 1/2 tsp grounded black pepper
  • 1/2 tsp salt
  • 1/2 tsp crispy sambal shrimps or chilli flakes (optional)(available in supermarkets)

(tsp = teaspoon; tbsp = tablespoon) 


Method :

Sprinkle salt and grounded pepper on potatoes. Add 1 tbsp olive oil.
Add finely chopped rosemary (use the leaf portions only). If you prefer the potatoes to be slightly spicy, sprinkle a little crispy sambal shrimps or chilli flakes on potatoes. Toss all ingredients evenly. Cover with aluminium foil and bake in oven (at 180 degrees celsius for 1 hour). Remove from oven every 15 minutes to give it a thorough toss to ensure even taste.
Remove from oven after 1 hour and roasted potatoes are ready to be served.
The aftertaste remained in our mouths the whole evening.


Grilled Salmon Pizza with Crispy Sambal Shrimps


My Arugula Rocket gave me its first harvest after I sowed the seeds 5 weeks ago. I was excited with my labour of love. I was not expecting good harvest as it was my first attempt to grow vegetables in my small organic herbs terrace. I was wrong! 

I thought the peppery flavour from the arugula leaves would marry well with the piece of salmon that I was thawing in the refrigerator and Grilled Salmon Pizza seemed like a good idea.

Most online recipes use smoked salmon for pizzas. I had no intention to follow suit. My recipe would minimise the usual 'fishy' smell from cooked salmon, thereby, making the pizza absolutely delicious.


Ingredients & Condiments :
  • 1 pc of 12-inch pizza crust (available in supermarkets)
  • 1 cup of arugula rocket leaves 
  • 1 cup of mozzarella cheese
  • 1 cup of salmon (about 300 gm)(sliced to thin pieces)(pre-marinated with few drops of sesame oil and 1/2 tsp teriyaki sauce)
  • 1 large onion (sliced to rings)
  • 2-3 small peppers (optional)(sliced to thin pieces)
  • 1 cup of pizza sauce (mix 4 tbsp sour cream with 2 stalks of finely chopped parsley well)
  • 1 tbsp crispy sambal shrimps (available in supermarkets)

(tsp = teaspoon; tbsp = tablespoon) 


The same crispy sambal shrimp that I used for my seafood paella.

Method :

Grease 12 inch pizza pan and pre-heat oven at 180 degrees celsius (for 15 minutes). I still feel that it is nicer to bake the pizza directly on the oven rack (without a pan) as it gives us a crispier crust, but the thought of cleaning the oven rack.....duh...
Spread pizza sauce on crust. Do not spread to the brim. Leave an edge.
As I was already using sour cream as base, mozzarella cheese was added sparingly to avoid the pizza being too rich, too oily. I only added shredded mozzarella cheese at the centre for flavouring purpose.
This is the essential part. Onions must be added to complement the salmon. This would bring down the 'fishy' smell of the salmon quite significantly. In this instance, I added a little sliced peppers too.
Arrange salmon pieces on top of the onions.
Sprinkle crispy sambal shrimps on the salmon pieces and pizza is ready for oven.
Bake pizza in oven at 180 degrees celsius for 20 minutes. After 20 minutes, increase heat to 200 degrees celsius and bake for another 5 minutes. At these temperatures, the salmon would still retain its moisture whilst the cheese would be slightly burnt when the pizza is removed fro the oven.
Remove hot pizza from oven.
Top with arugula rocket leaves and the pizza is good to be served.
If you prefer it to be more spicy, just sprinkle more crispy sambal shrimps (or chilli flakes) on your pizza before eating.
Absolutely delicious...you can savour the freshness of all ingredients.


Tuesday 25 August 2015

Three Cup Chicken 三杯鸡


Three Cup Chicken (三杯鸡) is a very flavorful dish, quite typical of its Taiwanese origin. It must be accompanied by plain rice or porridge for better enjoyment. 

As effortless as the name may sound, I personally would not cook the dish as suggested by its name - 3 cups (1 cup of soy sauce, 1 cup of rice wine and 1 cup of sesame oil). Assuming a normal cup size to be between 150 ml to 250 ml, I find it too salty and oily.

As I have no intention to cook a separate vegetable dish to accompany the chicken, my version of Three Cup Chicken will incorporate carrots and capsicums atop the usual ingredients (i.e. ginger, garlic, thai basil, spring onions, chicken).


Ingredients (enough for 2 to 3 pax) :

  • 550 gm of kampong/free range chicken (washed, drained and chopped into smaller pieces) 
  • 1 carrot (optional)(sliced)
  • 1 capsicum (optional)(cut into smaller pieces)
  • 1 cup of Thai Basil leaves  
  • 8 cloves of garlic
  • 10-15 slices of ginger (your preference) 
  • 2 stalks of spring onions (chopped)
  • 1 pc red chilli  (sliced for garnishing)
  • 35 ml dark or toasted sesame oil
  • 40 ml rice wine (i replaced with Shaoxing rice wine due to its stronger flavour)
  • 35 ml light soy sauce
  • 1 tbsp dark soy sauce
  • 1 to 2 tbsp sugar (your preference)

(tsp = teaspoon; tbsp = tablespoon)    

Tip : What are the differences between normal rice wine and Shaoxing rice wine? Normal rice wine is colourless, made with normal rice. It tastes milder and has a refreshing fragrance. Shaoxing rice wine is brown in colour and made with glutinous rice. It tastes stronger and more flavourful. Choose the wine based on your personal preference. I chose the latter.


Method :

Preheat pan and add sesame oil.
Add ginger and stir fry at medium heat.
Follow with garlic and lightly stir fry.
When ginger and garlic turn aromatic, quickly stir fry carrot slices.
Add chicken, turn up heat and stir fry the chicken pieces with other ingredients in the pan for about 1 minute.
At this juncture, add rice wine, light soy sauce, dark soy sauce and sugar. Let it simmer for 10 to 15 minutes (depending on the size of your pot/pan). You should see the sauce being soaked up slowly and thickened.
Try taste testing the sauce and chicken. If you are happy with the taste, turn off the heat and add capsicums, basil leaves and spring onions. If not, adjust to your taste accordingly first.
Stir and toss all ingredients for another 20 to 30 seconds with the heat off.
Transfer to serving bowl or pot, garnish and serve.
A single-pot dish that is delectable and presentable.