Sunday 25 June 2017

One Pot Pasta with White Clams, Baked Salmon Belly, Tobiko & Lumpfish Caviar


My husband wanted me to cook the salmon belly that he bought some time back. I didn't want to do it the normal air frying method. I thought it would be different to pair it with white clams in a one pot pasta. My decision turned out to be uniquely interesting. In this One Pot Pasta with White Clams, Baked Salmon Belly, Tobiko & Lumpfish Caviar, the flavours of all the ingredients seemed to come together cohesively, giving us a harmonious yet tasty one pot meal. My husband's a happy man as he kept raving how much he'd enjoyed his salmon belly in this dish. And I'm happy to see them happy.... 


Seasonings for Oven Baked Salmon Belly :
  • 1 tsp hoisin sauce
  • 1 tsp honey

Ingredients (enough for 4 pax) :
  • 300 to 350 gm spaghetti 
  • 400 gm white clams (degritted, scrubbed and cleaned)
  • 300 gm salmon belly
  • 1 cup of shredded vegetables (i used ice-berg cabbage)
  • 1 tomato (cut to wedges)
  • 1 tsp tobiko
  • 1 tsp lumpfish caviar
  • 4 cloves garlic (peeled and thinly sliced)
  • 2 mid sized onions (peeled and julienned)
  • 60 ml cooking cream
  • 2 cups water
  • 1 pc ikan bills stock cube
  • 1/2 tsp sugar
  • a pinch of salt
  • 1 tbsp chili flakes
  • a dash of grounded black pepper
  • a dash of paprika
  • 1/2 tsp dried parsley (for garnishing) 

(tsp = teaspoon; tbsp = tablespoon) 

Method :
  1. Pre-heat oven at 200C, grill mode.
  2. Combine honey and hoisin sauce to make a seasoning mixture for salmon belly.
  3. Coat salmon belly with seasoning mixture and send to bake at 200C for 10 minutes in a lined tray.
  4. Remove salmon belly from oven and set aside. 
  5. Boil a pot of water, add a little cooking oil, salt and cook the pasta till al dente.
  6. Rinse cooked pasta through running tap water and leave to drain aside.  
  7. Heat cooking oil at medium heat and stir fry aromatics (onions & garlic) till fragrant.
  8. Add a cup of water and fold in white clams.
  9. Add another cup of water, ikan bills stock cube, sugar and a pinch of salt. 
  10. Allow to simmer for 2 to 3 minutes.
  11. Fold in cooked pasta, cooking cream, baked salmon belly, tomatoes, vegetables and chili flakes.
  12. Turn to very low heat and stir till ingredients and sauce are even.
  13. Top with tobiko, lumpfish caviar, grounded black pepper, paprika and dried parsley before serve.
  14. Serve whilst hot.

(scroll to bottom of page, click on "Print" or "PDF" icon for printer friendly recipe)


Friday 23 June 2017

Huiji Honey Oven Grilled Fish 汇集山蜜焗鱼


*in collaboration with Huiji Honey

This is my second project with Huiji and I have enjoyed using their products! The Huiji Honey is a natural mountain honey that comes with a tinge of Jasmine fragrance. I find it subtle and welcoming. As a home cook, I find the honey a pleasing sugar replacement for cooking and baking. With such an affordable yet superior product, I have no qualms in experimenting it with one of my family's all time favourites - oven  grilled fish! And this Huiji Honey Oven Grilled Fish 汇集山蜜焗鱼 is so easy to prepare! It'll only take about 10 minutes prep time, 2 hours of marinating (which you do not have to do anything) and another 30 to 45 minutes of oven grill.  

I especially like the sauce for this fish, it's just so tasty! Seriously, with such a simple and yummy dish like this Huiji Honey Oven Grilled Fish 汇集山蜜焗鱼, there's really no excuse for not trying to cook it yourself! 


Ingredients (enough for 4 pax with rice and other dishes) :
  • 1 whole fish of your choice @ about 800 gm  (I used a red snapper)
  • 60 ml Huiji honey
  • 2 tbsp Hoisin sauce
  • 2 tbsp light soy sauce
  • a dash of grounded pepper (i used Szechuan peppercorns)
  • lime juice (from 3 limes)
  • 1 pc red chilli (sliced)
  • 1 medium sized onion (julienned)
  • 1 pc thumb size ginger (peeled and thinly sliced)
  • 2 cloves garlic (peeled and thinly sliced)
  • 1 stalk coriander for garnishing (chopped)

(tsp = teaspoon; tbsp = tablespoon) 

Method :
  1. Clean fish.
  2. Combine all seasoning ingredients in a bowl. Stir and mix well. 
  3. Line a sheet of parchment paper over a roasting pan or baking tray.
  4. Spoon a portion of seasoning mixture on the parchment paper.  
  5. Ensure fish is coated evenly with seasonings mixture inside out.
  6. Pour remaining mixture over fish.
  7. Cover top of fish with a sheet of foil.
  8. Fold parchment paper over foil.
  9. Allow fish to marinate for 2 hours in refrigerator. Remove from refrigerator 15 minutes before cooking.
  10. Pre-heat oven to 180C, Grill - Fan Assist mode. Use centre tier.
  11. Send to bake at 180C between 30 to 45 minutes, depending on size of fish and thickness of meat. My fish was not fully cooked by 30th minute, it needed about 45 minutes. 
  12. Remove fish from oven when time's up. To check if fish is cooked, open up the parchment paper and foil and insert a bamboo skewer into the fish meat, if the bamboo skewer comes out clean, the fish is cooked and ready to be served. Or the fish is ready if internal temperature reaches between 60C to 64C.
  13. Garnish with coriander and serve whilst hot with rice and other dishes. 

(scroll to bottom of page, click on "Print" or "PDF" icon for printer friendly recipe)


Monday 19 June 2017

Huiji Honey Ondeh Ondeh Cake 蜜糖椰丝蛋糕


* in collaboration with Huiji Honey

I find this sponge cake recipe for my Huiji Honey Ondeh Ondeh Cake 蜜糖椰丝蛋糕 one of the simplest yet workable. When I make mousse cakes, I also adapt the sponge cake base recipes from this. I like its simplicity because there's no need for butter and milk. And requires no more than 10 minutes bake time. This time, I even replaced 6 tbsp sugar with 80 ml Huiji honey and it works just as good! Isn't that a healthier alternative to heavy sugar cakes? It's my first time using Huiji honey and I'm already in love with the subtle and pleasant flavour. I find the honey very easy to apply for cooking and baking!

To get the Ondeh Ondeh shape, I actually used a silicon egg shape mould this time. I reckon it's alright to use semi-round shape or petite cup cake moulds too as the cakes would rise a little during the bakes, making them look like the circular or egg shape. Unlike the original Ondeh Ondeh, this sponge cake version is light and fluffy and there's not much compromise in taste. My husband said that it tasted almost like the real stuff. And we couldn't stop popping one after another into our mouths. Shhhh.....actually.......i like the simpler version better....I prefer them without the cream and grated coconut!


Cake Ingredients (I made 32 pieces with my egg shape mould) :
  • 6 eggs (I used 65 gm eggs)
  • 80 ml Huiji honey
  • 6 tbsp all purpose flour
  • 1 tsp pandan essence
  • 1/2 tsp pandan flavouring (optional)

Filling Ingredient :
  • 80 gm gula melaka (you would not use them all, subject to your preference)(cut to small pieces)

Method :
  1.      Sieve cake flour. 
  2.      Grease mould(s).
  3.      Pre-heat oven to 160C. 
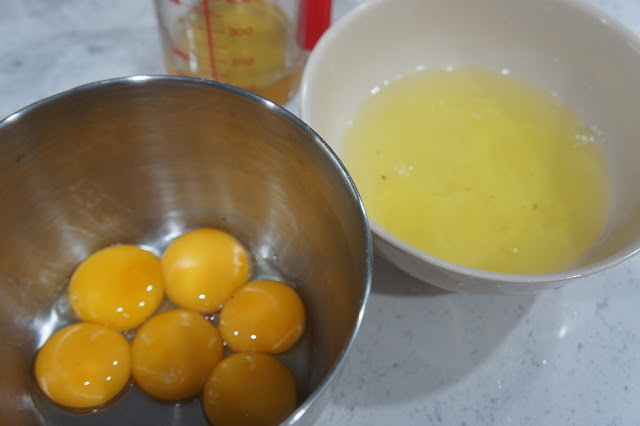
  4.      Separate egg yolks and whites.
  5.      Mix egg yolks with honey, pandan essence and pandan flavouring till light and foamy.
  6.      Separately, beat egg whites till stiff peak.
  7.      Combine egg whites onto egg yolks mixture in 3 batches. Gently fold till even.
  8.      Spoon batter into greased moulds.
  9.      Insert a small piece/cube of gula melaka into each portion. 
  10.      Send each batch to bake in oven at 160C for 10 minutes. 
  11.      Adjust oven temperature in accordance to mould size. Lower temperature for smaller moulds.
  12.      Remove from oven when cakes are fully cooked. 
  13.      Leave to cool on cooling rack before dislodge from moulds.
  14.      Meanwhile, prepare whipped cream and fresh grated coconut for frosting and coating.

Cream Ingredients :
  • 100 ml fresh cream
  • 1 tbsp Huiji honey

Other Ingredients :
  • 200 gm fresh grated coconut

Assembly Method :
  1.     Combine fresh cream with honey and whip till stiff peak form with mixer.
  2.     Chill cream in refrigerator for 30 minutes before use.
  3.     When cream is chilled and cakes are cooled, coat cakes on all sides with cream.
  4.     Sprinkle grated coconut on frosted cakes. Grated coconuts will stick on with cream.
  5.     Chill final cakes in refrigerator for 15 minutes before serve.

(scroll to bottom of page, click on "Print" or "PDF" icon for printer friendly recipe)