Showing posts with label Breakfast. Show all posts
Friday, 1 March 2019

Epok-Epok Sardines (Petite Sardine Puffs)


* in collaboration with Ayam Brand Sardines (Extra Virgin Olive Oil)

Who loves Epok-Epok Sardines like me? Who likes Epok-Epok Sardines but does not know how to make? It's my childhood snack after school! However, I usually have problem finishing one whole Epok-Epok sold by those makciks as they're so filling due to the huge sizes! These Epok-Epok Sardines (Petite Sardine Puffs), to me, are a perfect size as each can be eaten in 2 to 3 bites. Just nice!

This Epok-Epok Sardines (Petite Sardine Puffs) recipe is pretty straight forward and easy to make. I super love the pastry crust after deep frying...firm but almost melt-in-the mouth. Importantly, the pastry crust does not absorb much oil in the process of deep frying. But of course, how can I forget the more healthy and mouthwatering fillings that come from Ayam Brand Sardines in EVOO (Extra Virgin Olive Oil)! Definitely bringing this traditional snack to another level!


#Confirmcanlah

Ingredients for Sardine Fillings :

  • 2 cans Ayam Brand EVOO Sardine (120 gm each)
  • 1 large onion (diced)
  • 5 cloves garlic (minced)
  • 2 red chillies (deseeded and finely chopped)
  • 5 pcs curry leaves (finely chopped)(optional)
  • 2 to 3 tbsp curry powder (or to taste) 
  • 1/2 tsp cumin powder
  • 1 tsp chilli powder (optional)
  • 1 tsp sugar
  • 1 to 2 tbsp lime juice (or to taste) 
  • salt & pepper (to taste)
  • cooking oil (for deep frying)

Method :
  1. In a skillet/pan, heat a little EVOO (Extra Virgin Olive Oil) from sardines can. Fry onions, garlic and chillies till aromatic. 
  2. Add all seasonings and spices. Quick stir fry. 
  3. Turn to low heat and add sardines. Mash them into the aromatic mixture. 
  4. Taste test with sugar, lime juice, salt & pepper. Stir well.
  5. Turn off heat and set sardines fillings aside to cool down.

Ingredients for Pastry (yield 18 pcs using 7.5 cm diameter round mould) :

  • 1.5 cup plain flour
  • 5 tbsp butter (slightly chilled)
  • 1/2 tsp baking powder
  • 1/2 tsp salt
  • 3/4 cup water

Method :
  1. In a large bowl, use hands to mix flour with butter, salt and baking powder evenly till crumbly. 
  2. Add water bit by bit into dough till your desired texture (not too sticky for wrapping). Do not over knead.
  3. Allow dough to rest for 15 minutes.
  4. When ready, flatten dough with a rolling pin and use a 7.5 cm (diameter) round mould to cut out 18 pcs of equal sizes round pastry. 

Finishing Touch :
  1. Drain excess oil from sardine fillings. 
  2. Spoon the sardine fillings onto the centre of the round pastry. 
  3. Seal by folding the pastry in half, press the edges and crimp/flute in even patterns.
  4. When ready, heat cooking oil in saucepan/pot at medium heat.
  5. Deep fry the sardine puffs till golden brown.
  6. Drain on kitchen paper towels before serve. 

(scroll to bottom of page, click on "Print" or "PDF" icon for printer friendly recipe)


Tuesday, 8 May 2018

Mango Yoghurt Chiffon 芒果优格戚风蛋糕


Ingredients (for a 20 cm tube pan) :

Group A (Egg Yolk Batter) Ingredients
  • 4 egg yolks (est. 65 gm egg each)
  • 30 gm castor sugar
  • 70 gm cake flour (sieved beforehand)
  • 50 ml vegetable oil
  • 1/4 tsp baking powder (sieved beforehand)
  • 1/8 tsp salt
  • 60 ml mango yoghurt drink

Group B (Egg White Batter) Ingredients
  • 4 egg whites (est. 65 gm egg each)
  • 50 gm sugar (subject to your preferred sweetness level)
  • 1/8 tsp cream of tartar

(tsp = teaspoon; tbsp = tablespoon) 


Method :
  1. Pre-heat oven to 150C (upper and lower heat, no fan). To prepare for steam bake, pour hot water into a tray and insert below baking rack.
  2. In a large bowl, combine yolks and sugar and beat till mixture's light and fluffy.
  3. Fold in oil, mango yogurt drink into same bowl and mix well. 
  4. Slowly fold in flour, baking powder, salt and mix till a smooth batter is formed. Set aside.
  5. In a separate clean mixing bowl, add egg whites and whisk till foamy. 
  6. Start mixer and slowly fold in cream of tartar and sugar till stiff peak is formed 
  7. Gently fold in meringue into Group A's egg yolk batter in 3 batches. Each time, use a spatula to fold gently and swiftly. 
  8. Final cake batter (i.e. Group A + Group B) all ready when no streaks remain.
  9. Transfer batter to a 20 cm tube pan.
  10. Tap baking pan against kitchen top a few times to rid air bubbles.
  11. Use a satay stick to quickly stir through the cake batter in the baking tin as a final attempt to remove air bubbles if necessary. 
  12. Steam bake in oven at 150C for +/-70 minutes. 
  13. Remove from oven once satisfied with the colour of cake at the end of baking time.
  14. Immediately invert to cool. 
  15. Wait till cake is completely cooled down before dislodging from tube pan.
  16. Slice and serve.

Do note that temperature and baking time may vary in accordance to different oven makes, sizes and  performances. Make your own adjustments as you know your oven better. 

(scroll to bottom of page, click on "Print" or "PDF" icon for printer friendly recipe)


SaveSaveSaveSave
Monday, 23 October 2017

Bacon Buns 火腿面包


I wanted to get rid of the back bacon sitting in my fridge. These Bacon Buns 火腿面包 have to be one of the easiest buns that I'd made. Didn't refine the shaping and didn't want to crack an egg just for the egg wash....so they're quite raw looking....but trust me....they're yummy! Personally, I prefer to steam my buns for about 5 minutes before consumption as I like them really soft, fluffy and hot! How about you?

Recipe

Ingredients for Tangzhong/Starter :
  • 2 tbsp bread flour
  • 3 tbsp full cream milk
  • 3 tbsp water

Ingredients for Bread Dough (Yield 10 to 12 Buns) :
  • 2.5 cups bread flour
  • 2 tbsp baking milk powder
  • 1/2 cup full cream milk
  • 1/4 cup coconut oil
  • 1 large egg (beaten)
  • 1/4 tsp salt
  • 3 to 4 tbsp sugar (or to taste)
  • 1 tbsp instant yeast

Ingredients for Bread Fillings :
  • 10 to 12 pcs streak bacon 

(tsp = teaspoon; tbsp = tablespoon) 


Method :
  1. Prepare tangzhong first by mixing all ingredients in a small saucepan. Whisk until texture is smooth. Then cook the mixture at very low heat for 3 to 5 minutes. Whisk continuously. Tangzhong is ready when mixture thickens and leaves lines at bottom of saucepan as you whisk. Transfer to bowl and set aside to cool down.
  2. Prepare dough by mixing room temperature tangzhong with all bread dough ingredients in a bread maker, mixer or knead by hand. Knead until dough is smooth and elastic.
  3. Proof entire dough for 1.5 hour in oven. To proof, set oven to 50C, put dough in a tin and send to oven. Place a small bowl of room temperature water in the oven as well.
  4. Meanwhile, roll 10 to 12 pcs streak bacon (1 pc per roll). Set aside.
  5. Remove dough from oven when time's up. The dough should be puffed up by then. Shape dough to 10 or 12 equal size balls.
  6. Lightly flatten each ball in palm and insert 1 bacon roll into dough. Roll into ball shape again in between palms.
  7. Line 10 to 12 dough balls (with bacon fillings) in a lined baking pan or tray.
  8. Send buns to proof in oven again at 50C for further 45 minutes.
  9. Remove bun tray/pan and bowl of water from oven when time's up. The bun doughs should have risen nicely. 
  10. Adjust oven to 180C. 
  11. Bake buns for 20 to 25 minutes (or till buns turn golden brown colour). 
  12. Remove buns from oven and allow to cool in bun pan/tray for 15 minutes before serve. The buns would be even more soft and fluffy if you steam them another 5 minutes just before consumption.

(scroll to bottom of page, click on "Print" or "PDF" icon for printer friendly recipe)


Sunday, 19 February 2017

Siew Mai (Chinese Steamed Dumpling) 蒸烧卖


My husband and I are Cantonese (yes...pure breed!). Typical of Cantonese, having dim sum at Chinese tea house or restaurant has always been a weekend favourite pastime. Since young, I have been in love with many dim sum dishes. If time permits, I would really like to attempt the dim sum menu one by one. This morning's Siew Mai (Chinese Steamed Dumpling) 蒸烧卖 recipe is very much identical to the Fresh Prawn & Pork Dumplings (鲜虾水饺) recipe that I did some time back, except for few minor differences.

Unlike the Fresh Prawn & Pork Dumplings (鲜虾水饺), I have not used soy sauce as I prefer the meat colour to remain lighter in tone when steamed. Also, because I did the seasonings before going to bed last night, I was fearful that the soy sauce might leave a slight tinge of 'sourness' in the meat as the seasoned ingredients would be chilled overnight. Of course, as its name suggests, Siew Mai (Chinese Steamed Dumpling) 蒸烧卖 needs only to be steamed for around 10 minutes before serve. This is more convenient as I do not have to make the soup. The other distinctive difference is that the steamed version has the meat exposed at the opening (top of the pastry) whereas the soup version has to be fully wrapped within the pastry.


Ingredients (enough to make 20 to 24 pcs of dumplings) :
  • 300 gm of minced pork 
  • 4 to 5 pcs of dry mushrooms (soak in water first)
  • 3 small pcs of black fungus 黑木耳 (soak in water first)
  • 4-5 pcs of water chestnuts (peeled)
  • 1/2 a carrot (peeled)
  • 8 pcs of mid to large sized prawns (cleaned, deveined and pre-marinated with a pinch of salt)(gives better texture compared to shrimps)
  • 25 pcs of round dumpling pastry/skin
  • 1 tbsp tobiko (flying fish roe)

Seasonings  :
  • 1/2 tsp salt
  • 1 tsp sugar
  • 1/3 tsp grounded white pepper
  • 1/2 tsp ikan bilis or chicken stock powder
  • 1 tbsp sesame oil
  • 2 tbsp corn or potato starch 

(tsp = teaspoon; tbsp = tablespoon) 


Method :
  1. Finely chop mushrooms, black fungus, carrots, water chestnuts. 
  2. Cut each piece of mid-to-large sized prawns into 3. Set aside.
  3. Fold in chopped mushrooms, black fungus, carrots, water chestnuts and minced pork into a large bowl.
  4. Add seasonings into the large bowl.
  5. Mix Ingredients and seasonings well with a pair of chopsticks in one direction (clockwise or anti-clockwise) till the meat and ingredients become sticky and gluey.
  6. Cover bowl with cling wrap and chill for few hours or overnight. 
  7. Get ready to fill the dumplings pastry. Spread flour or corn/potato starch onto tray so that the dumplings do not stick together. 
  8. Use a spoon to spread a portion of minced pork mix and a piece of prawn onto each piece of dumpling pastry. 
  9. Then pleat/pinch the edges of the pastry in a clockwise/anticlockwise direction such that it holds the ingredients and stands firmly in the tray.
  10. Boil water in a large pot or pan.
  11. Oil the steaming plate or line it with baking paper and arrange dumplings onto it. This would ensure that the pastry skin would not stick to the steaming plate when cooked.
  12. Send the  steaming plate with dumplings for steam when water reaches boiling point.
  13. Steam in medium-high heat for 10 minutes.
  14. Insert a bamboo skewer into the meat when time's up. If the skewer comes out clean, the dumplings are fully cooked.
  15. Remove from steamer/pot. Plate the dumplings and garnish with tobiko on top of each dumpling. And serve whilst hot.

Tip 1 : The key to springy (弹牙) meat texture is to ensure that we blend the ingredients with chopsticks in a single direction (clockwise or anticlockwise) till the meat and ingredients become sticky and gluey.

Tip 2 : If someone is allergic to prawns at home, do it without prawns!


Making my own Siew Mai (Chinese Steamed Dumpling) 蒸烧卖 is not difficult, but a labour of love for the family. I am happiest to see them enjoying my works. A sure booster for an energetic and enchanting weekend morning.


Tuesday, 22 March 2016

30-Minute Homemade Pandan Kaya 自制香兰咖椰酱


I attempted this Homemade Pandan Kaya (Coconut Egg Jam) 自制香兰咖椰酱 twice in a day. I tried using the bread maker the first time. Alas! I could not regret more! 

Do learn from my genuine mistakes :

  • I should not add gula melaka into my bread pan before they dissolve completely. The screeching sounds - when the palm sugar bits hit the walls of the bread pan were traumatising! I thought the non-sticking bread pan would damage totally after just a few seconds. I definitely made a wise decision to switch off the machine immediately.
  • Unlike my previous jam making experiences, this Pandan Kaya mixture was splattering wildly within the bread pan. I had a hard time cleaning the bread maker (inside out) thereafter. It was still attracting ants hours after the machine had been cleaned.

I must say that there are many successful bread maker's Pandan Kaya recipes that one can find online. It was my fault that I did not do sufficient research. I jumped the queue and relied wrongly on my instincts.

Nevertheless, my second attempt was a successful one! I used a simple saucepan to do the job instead. In my personal attempt to make the Pandan Kaya more authentic, I replaced white sugar with gula melaka (palm sugar) in hope to achieve a more fragrant and traditional aroma. This Homemade Pandan Kaya (Coconut Egg Jam) 自制香兰咖椰酱 is easy to make and would take only 30 minutes! More importantly, it received thumbs up from everyone at home! 


Ingredients (enough for a 255 gm or 9 oz bottle) :
 Download Printer Friendly Recipe
Download Printer Friendly Recipe


  • 150 gm fresh coconut milk
  • 2 large egg yolks
  • 125 gm gula melaka/palm sugar (adjust in accordance your taste)
  • 1.5 tbsp pandan juice (learn how to DIY Concentrated Pandan Juice here)
  • 1/2 tsp pandan essence (optional)
  • 2 tsp corn/potato starch flour
  • 2 tbsp water


(tsp = teaspoon; tbsp = tablespoon)    


Tip 1 : Omit egg yolk so that the cooking timing can be shortened by increasing heat. This would avoid lumpy jam caused by the egg whites.


Tip 2 : Use gula melaka (aka palm sugar) instead of white sugar for the traditional flavour.


Method : 

  • Pound gula melaka/palm sugar to bits.

  • Beat egg yolk and sieve to ensure egg mixture is smooth.
  • Add gula melaka/palm sugar, egg mixture, coconut milk, pandan juice and pandan essence to saucepan and cook at low-to-medium heat. Evenly stir the mixture in the saucepan while cooking so that gula melaka/palm sugar would be completely dissolved. Continue to stir to prevent lumpy mixture.

  • Add starch mixture (by combining 2 tsp corn/potato starch with 2 tbsp water and stir till all flour dissolved in water) to saucepan after 15 minutes.

  • After few minutes of continuous stirring in the saucepan, the pandan kaya would be cooked down. It would look thick and rough.

  • To achieve a smooth and silky texture, use an electric blender to blend the pandan kaya mixture with just a few quick pushes (do not over blend).

  • Once blended, the pandan kaya should achieve a smooth and silky texture. Use a spoon to scoop pandan kaya from the blender. The mixture should not drip (meaning the thickness and texture is correct) if it is blended just nicely.

  • Transfer pandan kaya to a sterilized bottle. It is important to have it completely cooled down before capping to avoid condensation in the bottle. Condensation would result in mouldy kaya. Never consume mouldy kaya. 


Store the freshly made Pandan Kaya 香兰咖椰酱 in refrigerator subsequently. The Pandan Kaya 香兰咖椰酱 has a short life span due to the usage of fresh coconut milk and eggs. That explains why my recipe is meant for a smaller serving. We would not be in time to consume anything more in a short time frame. Try to consume within few days of preparation.

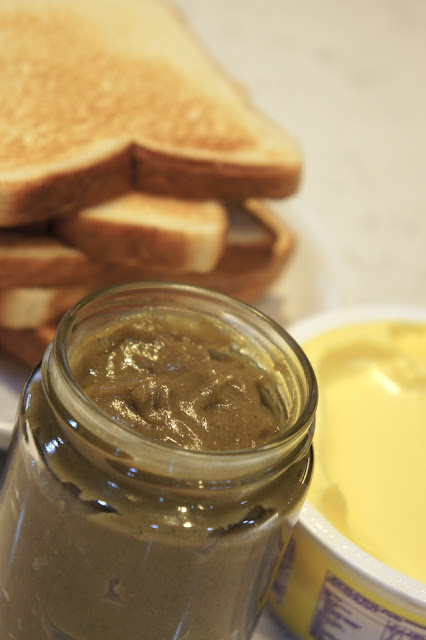
My favorite butter and kaya toast......here I come.....


P.S. - If you prefer to make a larger portion, you would not go too wrong with a 1:1:1 rule. That means almost equal portion of coconut milk (e.g. 200 gm) vs egg yolks (e.g. 200 gm) vs gula melaka (e.g. 200 gm) although I personally prefer to cut down on gula melaka.